No matter our favorite breed of horse or chosen discipline; whatever our age or skill level, if we ride horses, we yearn for a balanced, stable, and independent seat that allows us to move with the horse and direct him using subtle aids without interfering with his ability to perform.
In honor of July 4, 2014, we at TSB are sharing four of our favorite exercises to help develop a little seat independence in all of us:

1 The Teeter-Totter from Centered Riding 2 by Sally Swift
- Stand quietly and comfortably erect, feet slightly apart.
- With your whole body straight, tip forward as far as you can without having to take a step to catch yourself.
- Hold yourself in this extreme position with your feet quiet. Notice how much tension there is in your body, your feet, legs, torso, and neck.
- Come back to a balanced position in the center and relax.
- Now lean backward and notice again the degree of tension in your whole body, especially up the front of your thighs and torso.
- Come back to the center and feel the freedom and ease of being in what I call “pure balance.”
- Now imagine you are on your horse–you need to be in “pure balance” with your center directly over your feet to ensure you are not unconsciously transferring tension to the horse. This “pure balance” applies to all seats and disciplines. Practice the Teeter-Totter exercise regularly to build and maintain awareness of your balance and center.

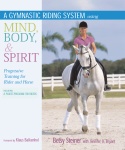
2 Push Hands from A Gymnastic Riding System Using Mind, Body, & Spirit by Betsy Steiner
- Stand squarely facing a partner, hands at your sides.
- Reach out to your partner, and have your partner reach out to you, and place your hands palm to palm. You should be close enough that your elbows, and your partner’s elbows, are slightly bent. Your knees should also be slightly bent.
- Have your partner give you a vigorous push with her left hand while you try to keep your right hand and shoulder from moving. As you resist the push, you’ll feel tension and resistance in your entire body and maybe lose your balance and have to take a step back.
- Now have your partner again give you a push with her left hand. This time, release your right hand and shoulder and allow them to go where your partner moves them. When you “release” in this way, allowing your shoulder to move backward and your partner’s had to go forward, the tension of the push is dissipated and there is no resistance in your body.
- Repeat the exercise with the opposite hands.
- Push Hands shows us how the horse and rider must “give” to each other, and how the rider must be able to receive pressure as well as apply it by being supple and centered. When you’re relaxed in your arms and shoulders, for example, you are able to maintain your balance and center. Try to achieve the same “give-and-take” of pressure with the horse when you ride.

3 Find Your Flat Back from 40 5-Minute Jumping Fixes by Wendy Murdoch
- Sit on the edge of a flat bench or chair. If possible, do so beside a mirror so you can see what your back looks like when it is flat.
- Place the back of one hand on your lower back. Make sure your hand is on the waist area, not the sacrum.
- Place your other hand palm up under one seat bone and rest on your hand. Feel how your lower back and seat bones change position in relation to each other when you hollow, round, or flatten your lower back.
- Gradually change from one position to the other making smaller and lower movements until you have a definite feeling that your back is flat and broad. Notice what happens to your weight on the bench or chair. Do your buttocks muscles soften? Can you sink back into your hips as if to sit more deeply? When your back is flat, the seat bones will follow the line of the your back.
- Repeat the exercise in the saddle. As your back hollows, your seat bones point back toward your horse’s tail; as your back rounds, your seat bones point forward toward your horse’s head; when your back is flat, your seat bones follow the line of your back, straight from head to seat. A flat back stabilizes your pelvis and upper body so that you feel more secure in the saddle.

4 Plank on Mat: Knees from The Riding Doctor by Beth Glosten, MD
- Lie on your stomach on an exercise mat.
- Bend your elbows and keep them by your sides, placing your forearms on the mat. Bend your knees so your lower legs are off the floor.
- While keeping your shoulders stable, lift yourself onto your knees and forearms into a suspended plank position. Seek a long and neutral spine position, and avoid pulling your shoulders up around your ears. Try to keep your pelvis level–it shouldn’t be pushed up toward the ceiling.
- Hold the position for 30 to 60 seconds.
- This is a fantastic integrating exercise for core muscle function and shoulder and leg support, stabilizing spine alignment. In the saddle, you want stability of the spine–that is, despite changes in forward or sideways energy, you want to keep your body in a balanced upright position.
Happy Independence Day from Trafalgar Square Books!
Visit our online bookstore at www.HorseandRiderBooks.com, where shipping in the US is FREE.

